This article is obsolete, it refers the older version 1.8.0. Please open the latest version of the article. Step-by-step tutorial
This tutorial describes step-by-step how you can work with Similarity in the fastest and the most effective way.
The most advanced and powerful function of Similarity is its search of duplicate music files, so it is this function that we focus on in this article.
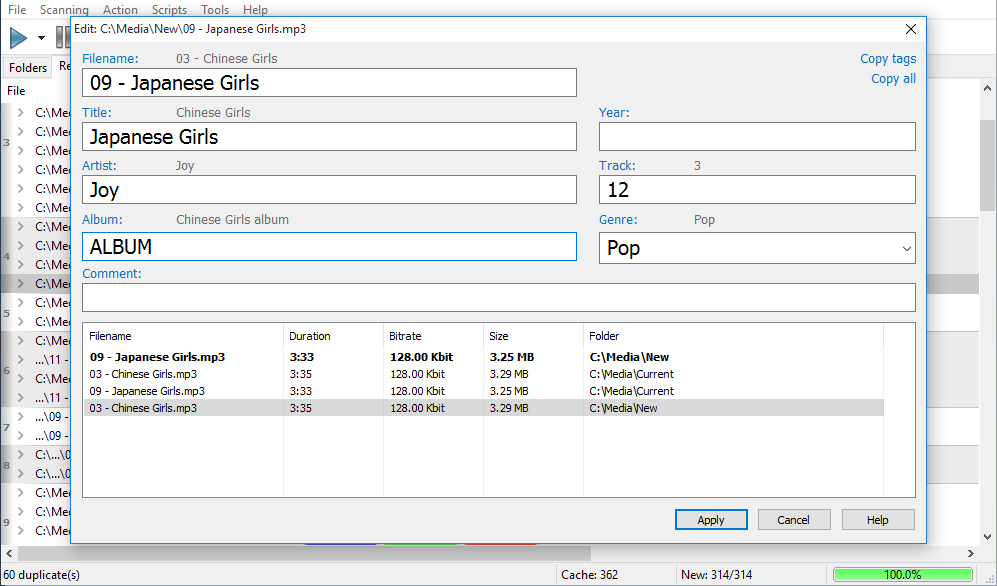
Notice, we do not review all and every function of the program, including the tag editor, tag auto-fill etc.
To learn more about these functions, please refer to the FAQ or other articles at our website.
This tutorial is split onto 2 parts. In the first part we examine a simple case of searching doubles that uses the default settings
of the application, and doesn’t require any additional knowledge.The second part takes up a more specific search with additional options.
Part 1
Let’s first see what our problem is. We have folders containing many music files – files we industriously gathered all over the Internet for
months – and now it would be great to bring some order to this music file chaos. First of all, let’s find duplicates in these folders and delete them.
-
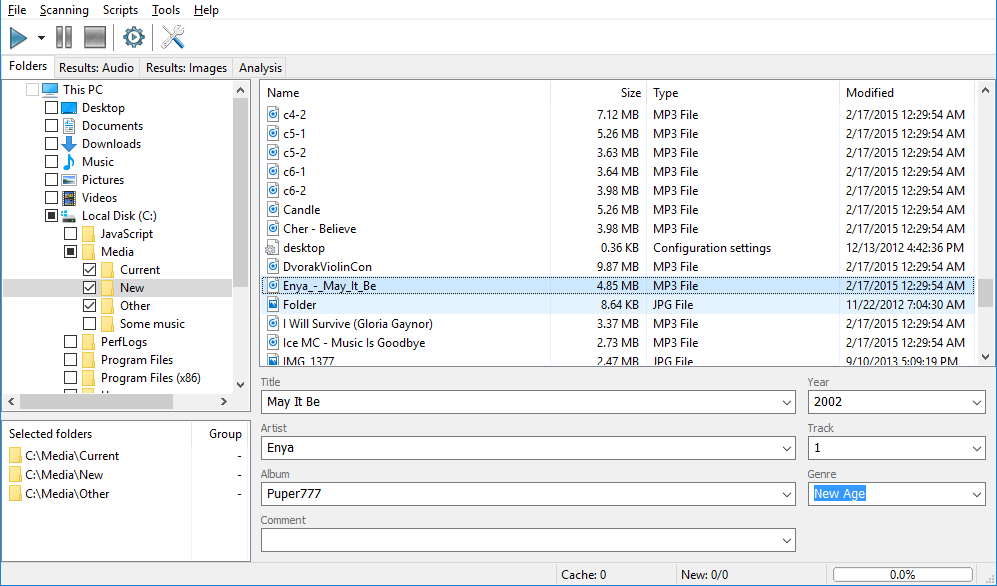
Run Similarity. Upon startup you should an Explorer-like window with its left panel containing folders, and its right panel displaying the contents of those folders.
The lower left corner shows currently selected folders and is empty upon startup.
-
Now in the left panel with a folder tree find your folders with music and select them with check marks.
It is worth mentioning, that you can easily use your network folders, removable devices, entire disks or even Windows 7 libraries.
-
If you done everything right, the bottom left pane will display your current selection. If necessary, you can remove any of them from here with a right-click menu.
-
Now the tricky part. Find the Play button on the toolbar and click it.
The scan process should run. If everything is going right, you should see constantly changing numbers indicating the amount of scanned files and the overall progress.
The scan results are displayed in real time, so you can start working with them right away, but for the purpose of this tutorial we will wait until the process finishes.
By the way, Premium version can interrupt the scan process at any time saving the current progress.
On the next run, the application will continue the scan from the point it stopped the last time.
The free version users probably shouldn’t interrupt the scan process, or they’ll have to restart it from the beginning.
But even in this case the subsequent scan will be much faster thanks to the advanced cache system implemented in the program.
-
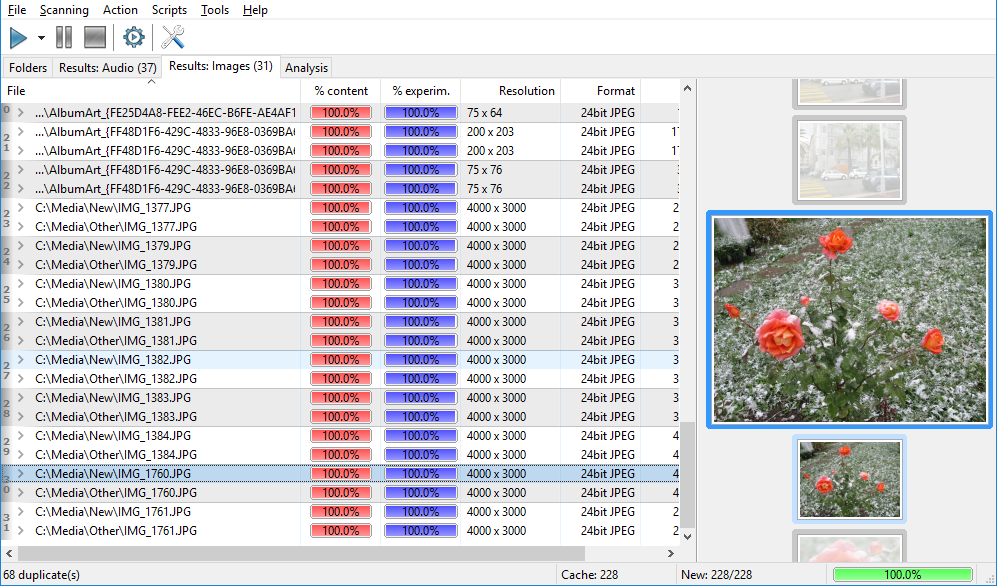
Once the scan finishes, switch to the "Results" tab. A number in parenthesis near the tab name is the amount of duplicate pairs.
The window shows groups of duplicates. To learn how groups are built, please refer to this article.
-
Let’s start working with duplicates. First of all, click the "Rearrange groups" button on the toolbar and select the desired sort priority.
Please note, the "Rearrange groups" function is only available in the Premium version.
Free version user can only work with groups as they initially are. Anyway, you can sort the list by one of the resulting fields simply by clicking the header of this field.
After the "Rearrange groups" completes, the best results will be moved to the top of each group, while the worst ones will be in the bottom. Now we are ready to delete duplicates.
-
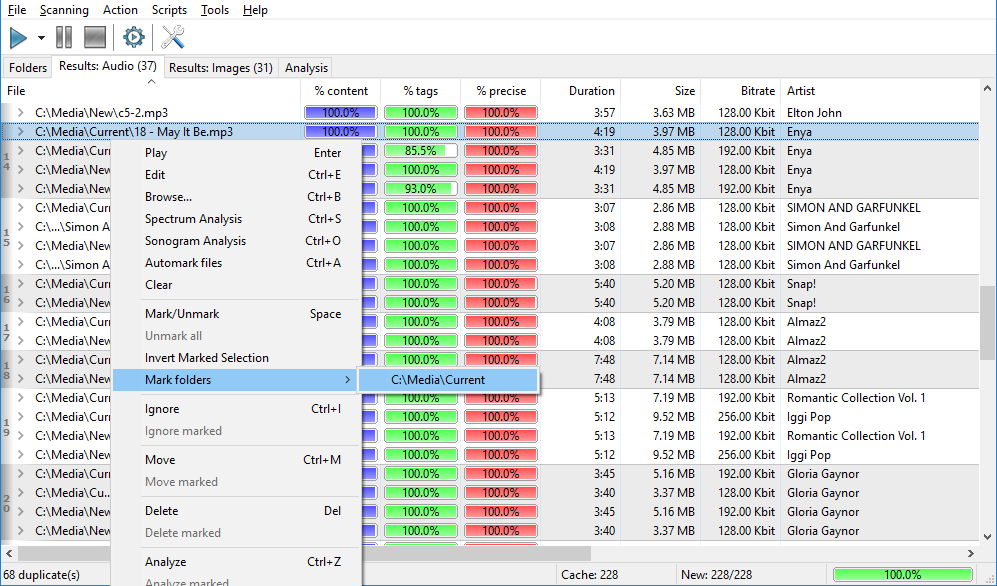
You have two ways here: you can either manually review each file and decide whether or not you want to keep it, or use the "Automark files" command that
does all the work automatically.
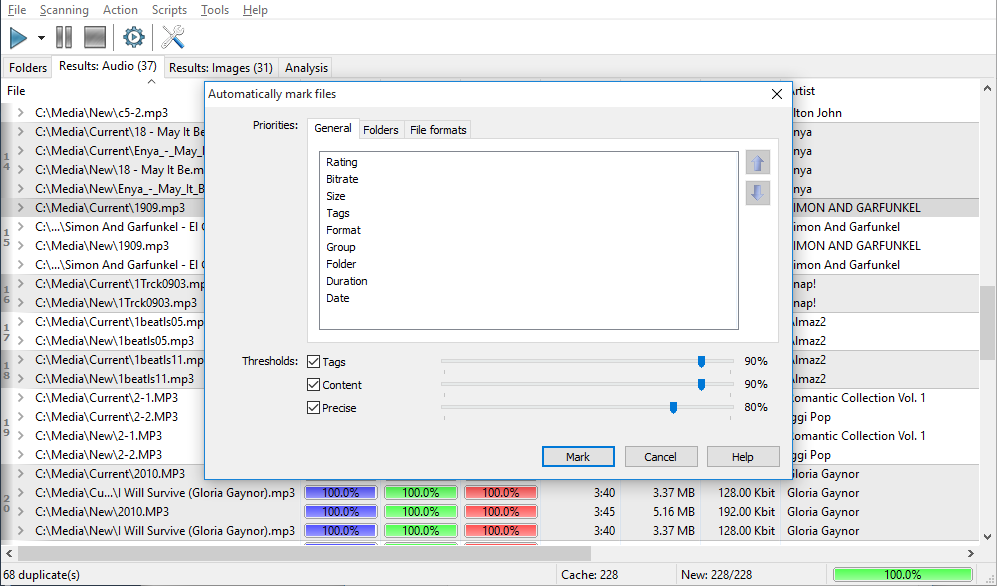
This function is only available in the Premium version. Select this function, set desired criteria for the quality of a file
and threshold values (to avoid mistakenly marked similar yet not duplicate files) and click the "Mark" button. This function doesn’t perform automatic deletion
of files; it merely marks the worst files of all duplicates in a group. An action to be applied to these files is up to you.
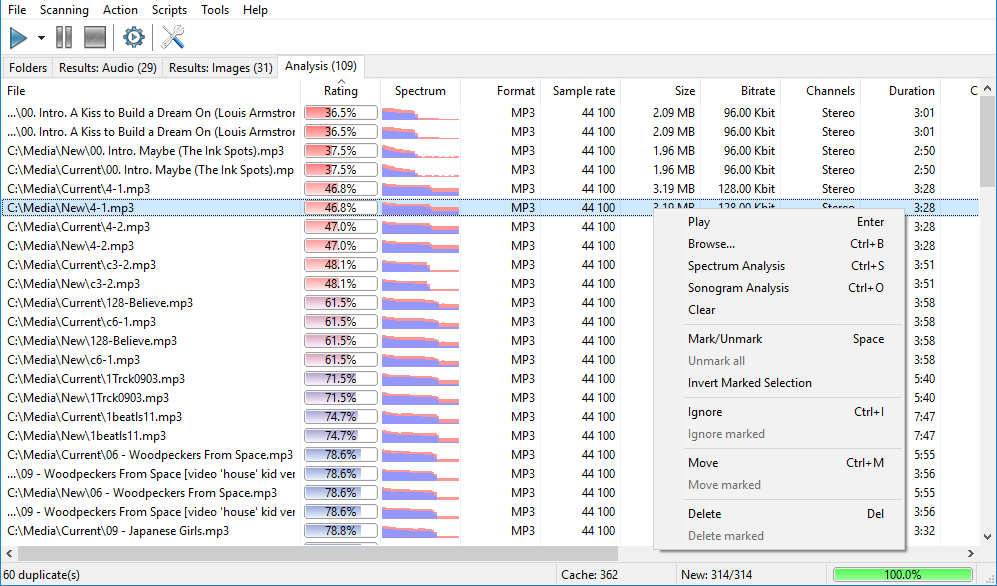
Now let’s see how this works in the manual mode. The main operations over files are performed via the right-click menu or with keyboard shortcuts.
The list supports multiple selection – use Ctrl/Shift and your mouse to select several files and apply the same operation to all of them.
To mark a file, use the corresponding command in the right-click menu – "Mark".
-
Let’s go back to the deletion. After we have marked files either automatically or manually, we should delete them. This is easy: use the
right-click menu again and select "Delete marked", then confirm the deletion. All files will be moved to Recycle Bin and simultaneously
they will disappear from the corresponding groups in the result window.
Continue with the rest of doubles the same way.
Part 2
We won’t explain the work with functions of the program in all details, as we suppose a user has already taken a look to the help system.
The method described below only work in the Premium version.
So, let’s say we have faced the following problem: we have old and trusted
collection of music files checked all over and we don’t want to change anything in it; and we have a new set of music compositions we would
like to include to our collection, but we want to check, if we already have some of them in the collection. Also, we’re very busy men, so
we don’t waste time filling tags and all that stuff, so comparing by tags is meaningless in this case, so we should turn it off.
We want to see only true duplicates in the results and not files that just similar to ours. Ok, let’s start:
-
Run Similarity
-
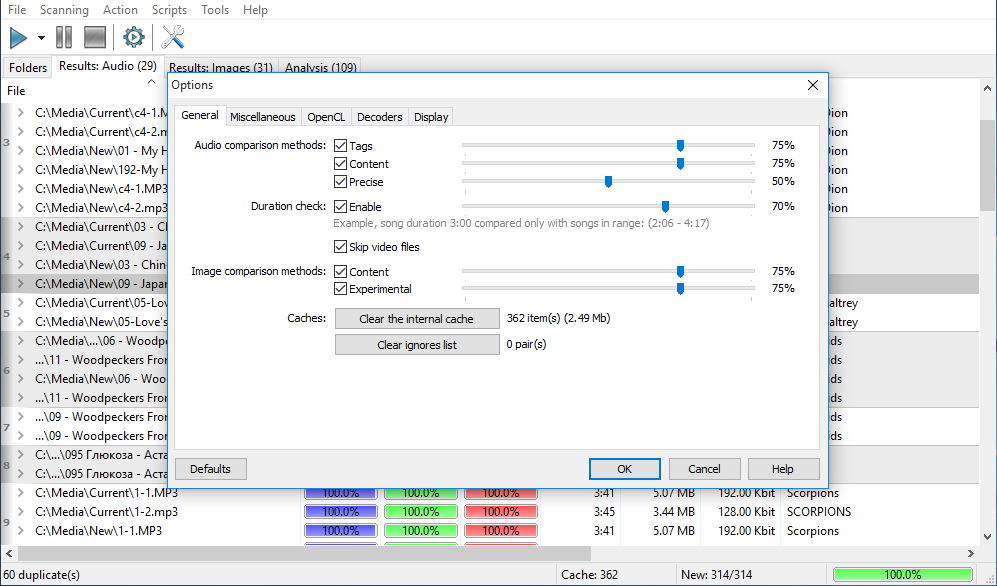
Bring up the "Options" window and turn off the comparison by tags option. Then, move threshold sliders of the rest two algorithms to 90.
-
Select folders with our collection and a folder with new files.
-
In the selected files list use the right-click menu to mark folders of our collection as group #1 and a new files folder as #2.
This function is only available in the Premium version; you can’t do this in the free version.
-
Run the scan process.
-
The rest of the actions are performed the way they are described in the part 1.
Finally, we learned to limit the scope of a scan – only files from different groups are compared with each other.
This is utterly convenient to compare your old collection with some additions of potentially new files. Also, we have turned off comparing by tags,
because tags may be filled in incorrectly, or isn’t set at all. Another helpful feature is adjusting threshold values which allows setting
stricter or more soft compare conditions for the files to be considered as duplicates.
|